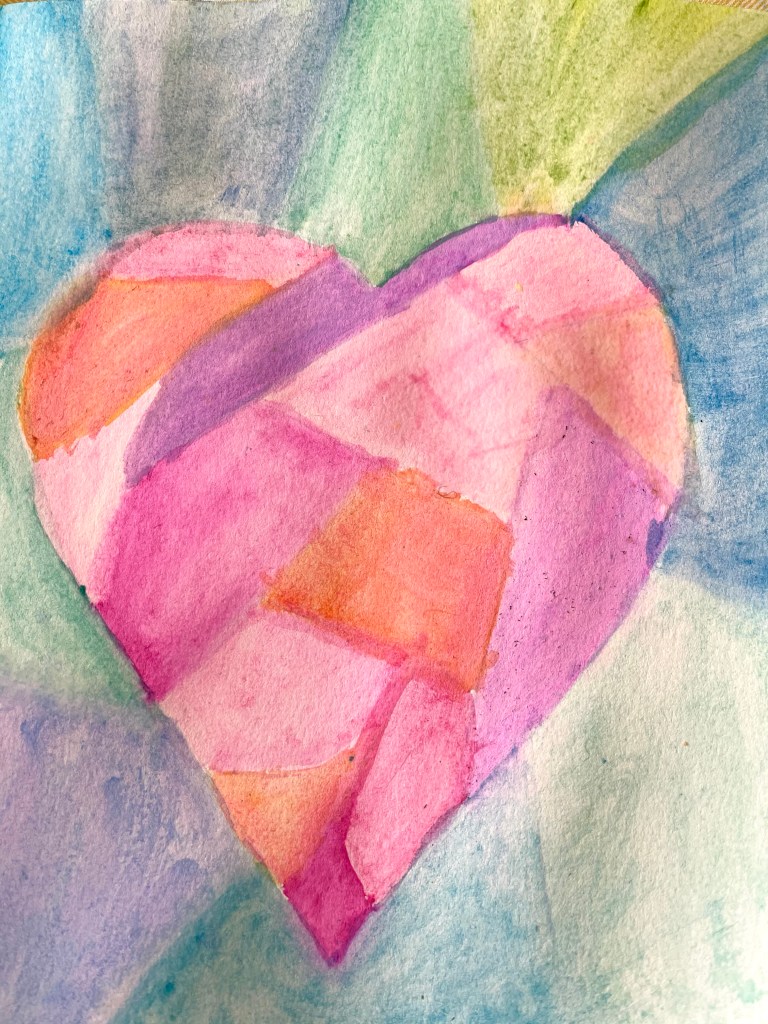
I love to do art with the kids around the holidays. We have some of our best conversations while we get creative with art because its one of the few ways I can get my kids to stay still for that long. 😆 For this craft we used water colors to make an image similar to a stain glass heart.
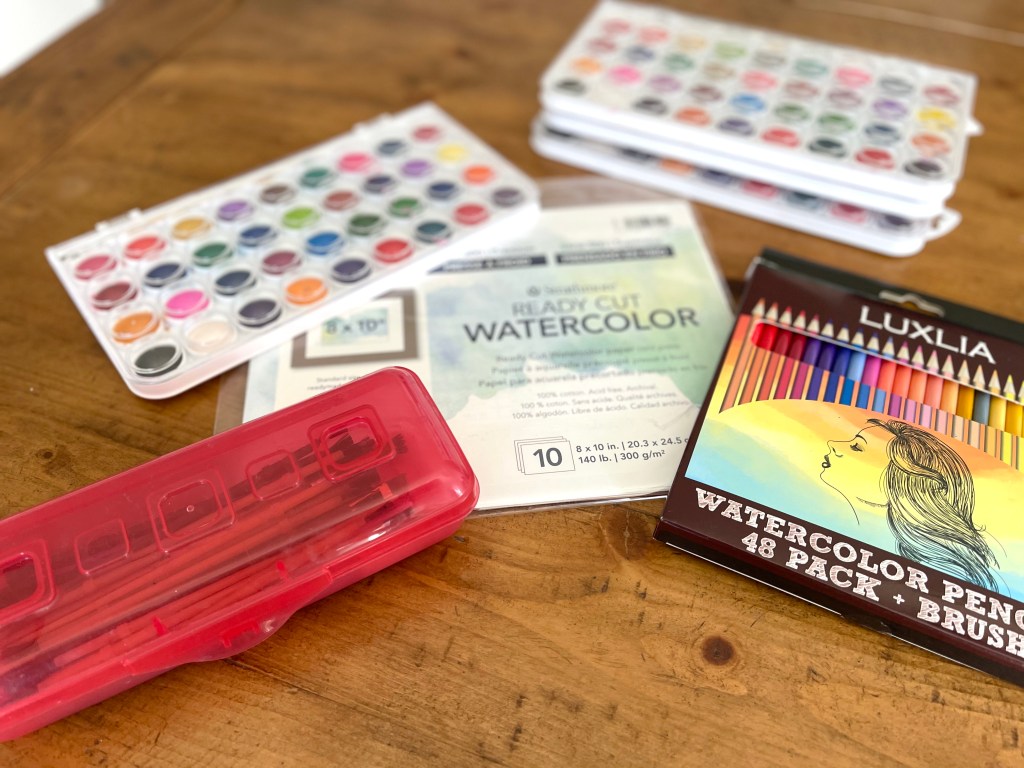
I got all of our supplies on Amazon and we got a handful since we now do art more frequently since starting to homeschool our younger kids. I love how many color options we have with this set and I definitely think the watercolor pencils are a must. To be able to have any lines blurred definitely helps give you a true watercolor look. My only warning is that the brush that came with the pencils is not great. It shed like crazy but the paint sets also came with brushes and they worked plus I had some extras on hand so it wasn’t a problem for us. Just make sure you have some other brush options if you are getting the pencils. The colored pencils themselves are great though. Your last supply needed is of course watercolor paper which is a necessity. Standard paper will get too wet and break easily, especially if you have young kids painting, they tend to soak their papers. There is a difference between hot pressed and cold pressed paper but to be honest, I didn’t do much research on that because we’re not trying to be expert watercolor artists here, we just wanted to make something pretty and this paper worked great for us.
I didn’t get a picture of what we did first but you can kid of see if you zoom into the picture. First, we used a colored pencil to draw a heart….any size and anywhere on their paper they wanted. Then we drew lines all throughout the inside of the heart. Then we drew lines coming out of the heart to the edge of the paper. You are creating your “glass pieces” by doing all of this. We talked about it looking like you had a heart etched in a piece of glass and then you dropped it and it kind of shatters all throughout without breaking.
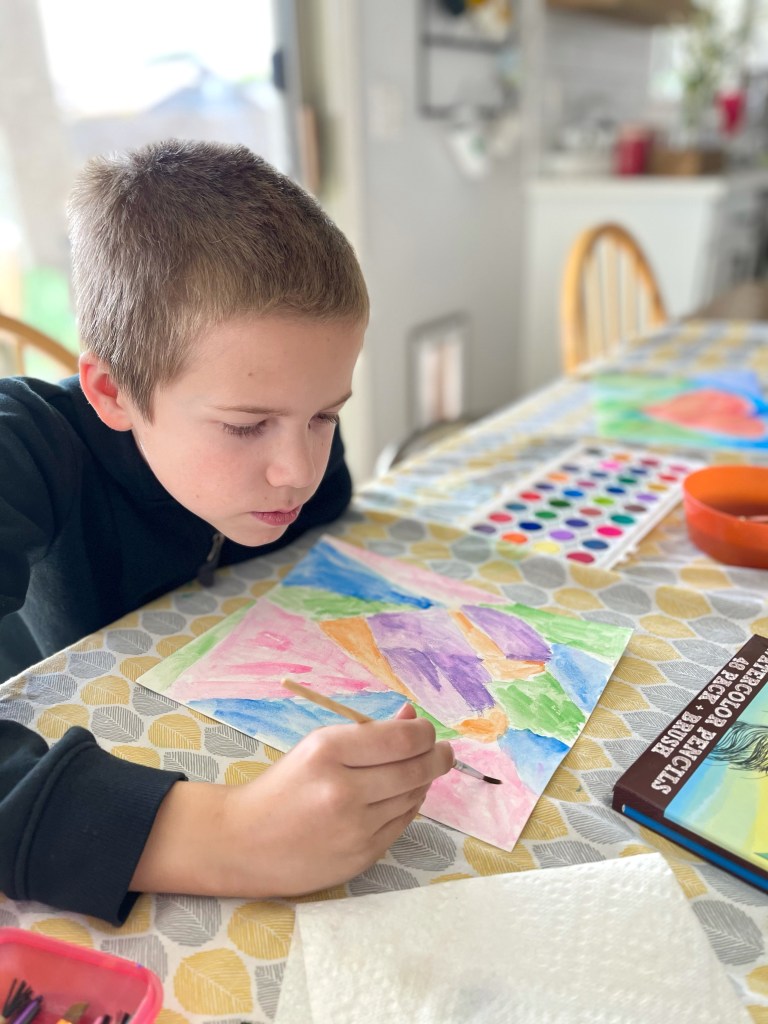
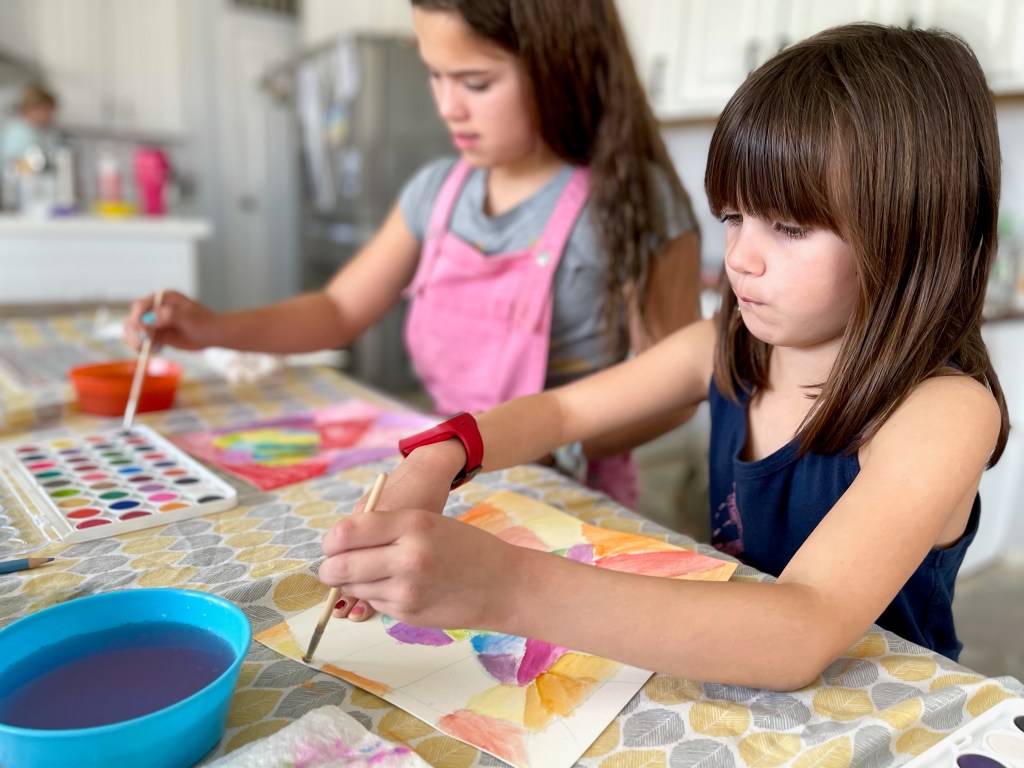
Then comes the best part….painting! Get your brush wet, take it to your paint color of choice and get the color nice and wet and then start painting. We talked about all the different techniques we were learning as we went. Having a lot of color on and then using extra water to spread it out, layering colors, keeping it muted etc. The only real “rule” with this piece is that whatever colors you use in the heart you can’t use around the perimeter and vice versa. We also learned that it looks best when after you color each individual section you then go back over with just some water on your brush and kind of blur the line between the pieces.
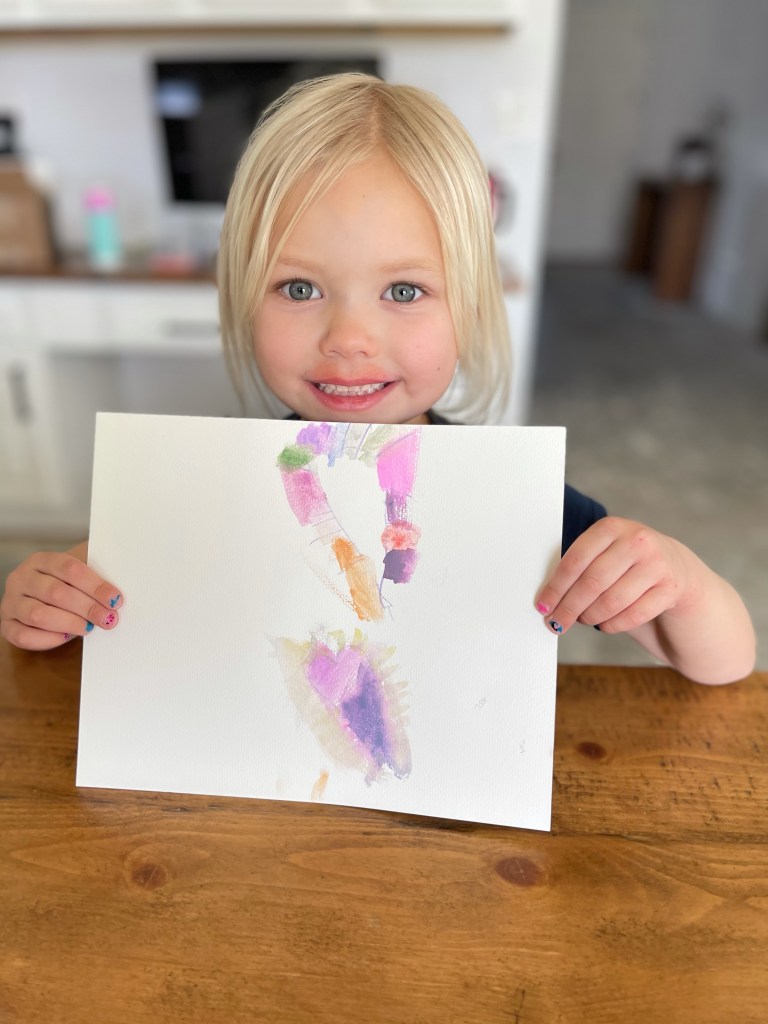
Our preschooler did her own spin on our project. Looking all cute and proud. 😍
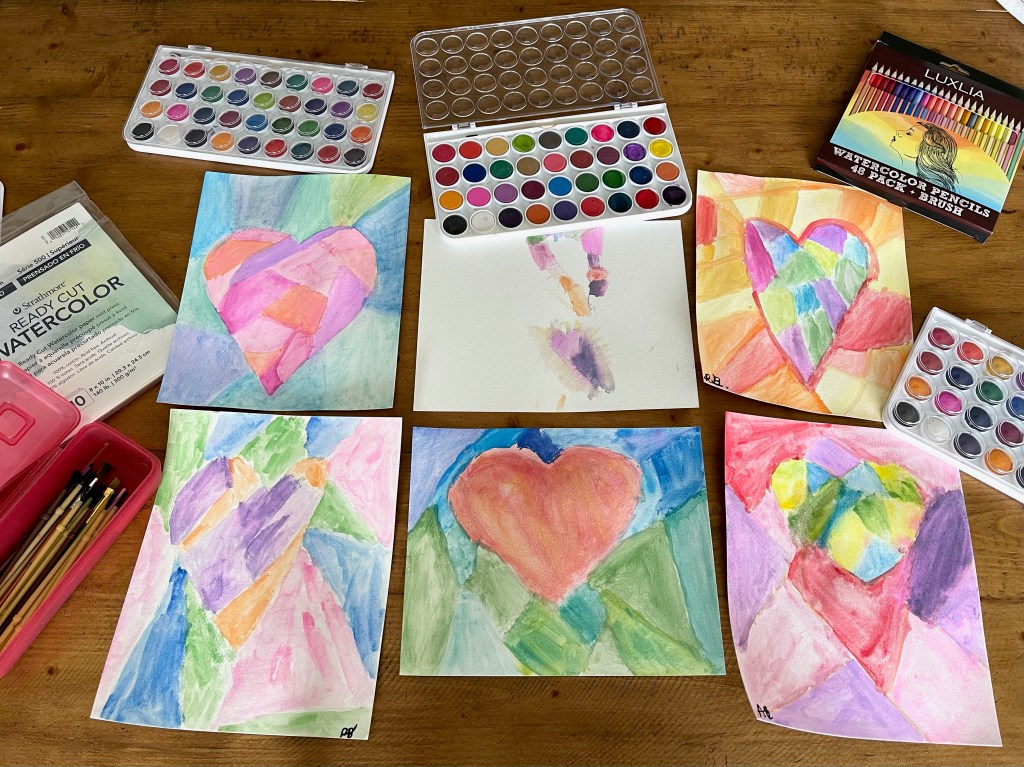
Look how cute they all turned out! We are excited to keep playing with watercolors and improve our skills over time. The best part of all of this was the creativity going on, conversation flowing and laughter throughout. You’ll never regret spending time like this with kids, but it also doesn’t have to be a time consuming, expensive, day project either. It’s all about balance and everyone’s “balance” is different. So don’t compare, have fun and make memories!
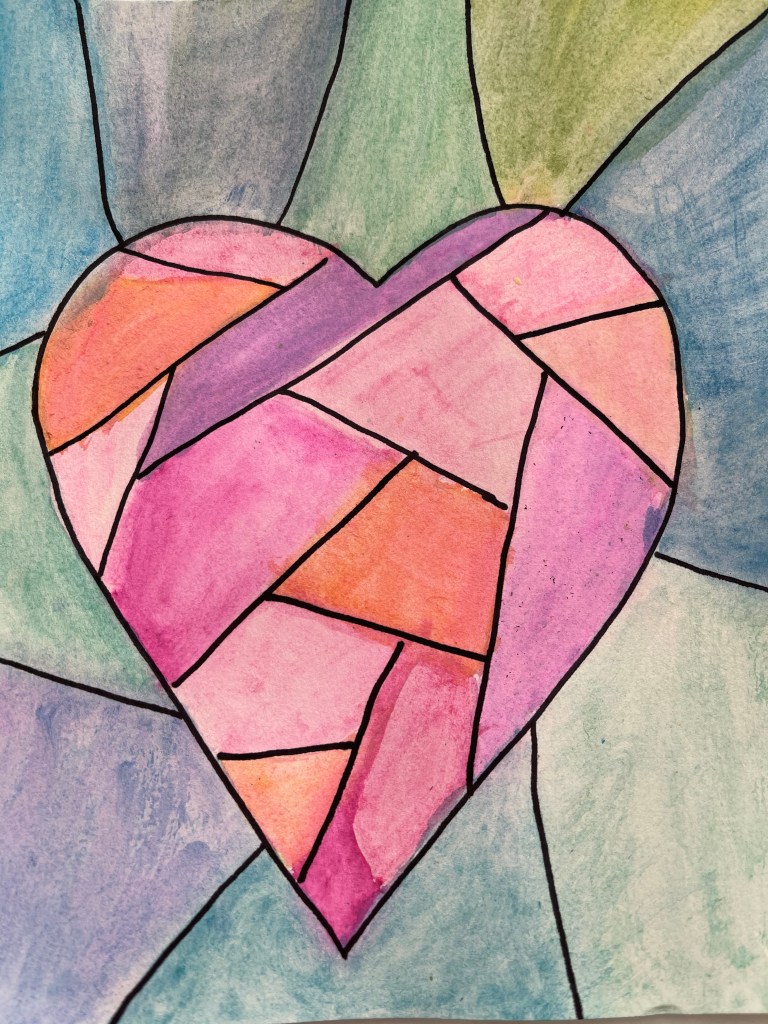
One last thing to add actually. For a true stained glass look, add black lines where you blended your colors. We worked on the technique of blending more this go around but if you want that true stained glass look you need those black lines!
xoxo,
Jenny


Leave a comment